
All nine Probably Stolen starting scenarios compared: equipment, difficulty, income line, and which start fits a first run or a challenge.
Probably Stolen Starting Scenarios: All 9 Starts
Probably Stolen does not lock you into a class, but the starting scenario decides what you own on day one and which systems you can touch without saving up. The choice matters most in the first week, when a single machine or permit can be the difference between a stable shop and a missed rent payment.
There are nine starts in the 1.0 build. This page compares what each one gives you, how hard it is, and which income line it naturally supports. For the first-hour loop, read the beginner guide. For mode modifiers, see difficulty.
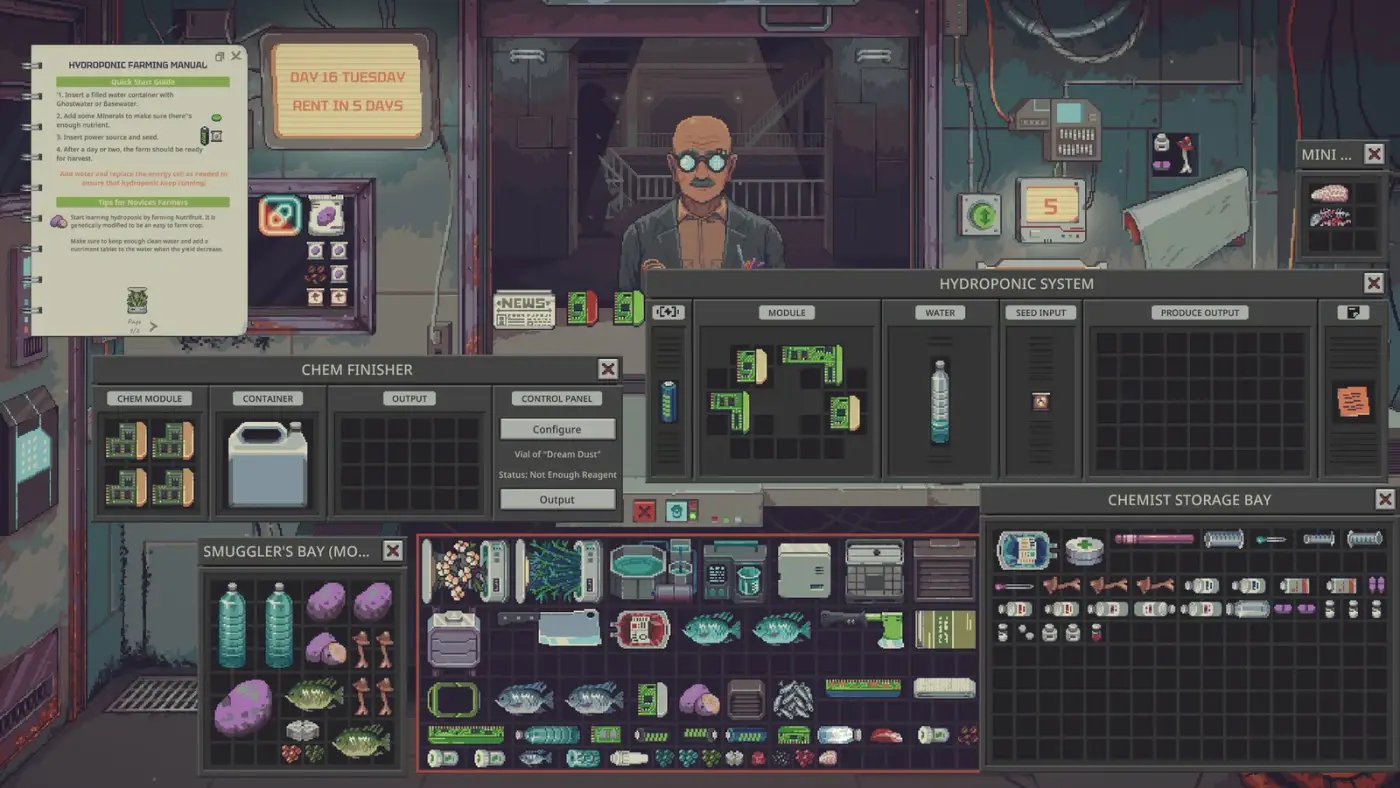
The scenario is a opening kit, not a permanent class. Water Merchant and Chemist give you a machine worth more than the cash difference; Apprentice gives you flexibility.
Quick comparison
| Start | Opening kit | Income line | Difficulty |
|---|---|---|---|
| Apprentice | General starter stock | Resale and appraisal | Easy |
| Water Merchant | HydraTech purifier | Water testing and sales | Easy |
| Fence | Stolen goods contacts | Contraband resale | Medium |
| Rock Bottom | Nothing | Whatever you can scavenge | Very hard |
| Hydroponic Farmer | Growing equipment | Crops, food, wine inputs | Medium |
| Gunsmith | Class 1 permit, firearms, ammo | Guns and weapon mods | Medium |
| Chemist | Lab equipment | Chemicals and pharmaceuticals | Medium |
| Rat Wrangler | Rat-related setup | Breeding and animal sales | Medium |
| Aquafarmer | Tilapia and recirculating system | Fish and water-quality products | Medium |
The exact contents of each kit are shown on the scenario selection screen and can vary with starting perks. Treat the table as a direction, not a fixed inventory list.
Apprentice
The Apprentice is the generalist. You get enough stock and freedom to learn appraisal, customers, and rent without a specialised machine forcing a route. That makes it the best first run for most players.
The downside is that you have no obvious production edge. You will need to choose a line — water, chemistry, food, or resale — and invest in it. The Apprentice start rewards curiosity more than optimisation.
Pick it if: you want to see the whole game before committing. Avoid it if: you already know you want to run a specific machine.
Water Merchant
The Water Merchant starts with a HydraTech purifier, which is one of the most useful early machines in the game. Water is cheap to buy, constantly demanded, and easy to test. The purifier lets you turn dirty input into a saleable grade without building a full chemistry line.
The catch is liability. Selling contaminated water can trigger complaints and reputation damage, as the in-game letter about a customer's death shows. Test before you sell, and do not relabel a dirty bottle as clean.
Pick it if: you want a low-capital, repeatable income from day one. Avoid it if: you dislike testing and record-keeping.
Fence
The Fence is the stolen-goods route. You get access to illicit inventory and the margins that come with it. You also get Security attention, raids, and the constant question of whether the buyer or the officer is the bigger threat.
The Fence is not a beginner-friendly money printer. It requires a plan for storage, display, and investigation. Keep contraband out of the window, and do not assume a high price means a safe sale.
Pick it if: you want risk, negotiation, and the black-market side of the station. Avoid it if: you want a quiet first run.
Rock Bottom
Rock Bottom is the challenge start. You begin with nothing, which means no stock, no machine, and no safety net. The first few days are about finding any profitable transaction and keeping the rent paid.
The related achievements — From Nothing and From Nothing, the Hard Way — confirm that finishing from this start is meant to be an accomplishment. It is a bad choice for a blind first run and a good choice for a second run when you already know appraisal values.
Pick it if: you want the hardest possible opening. Avoid it if: you have not learned the rent and appraisal loops.
Hydroponic Farmer
The Hydroponic Farmer starts with a growing system. Crops feed several lines: food sales, wine ingredients, and the genetics/DNA side of production. It is a slower start than water, but the output is more valuable once the cycle is running.
Hydroponics needs clean water, nutrients, and power. The in-game manual warns that poor water or missing nutrients reduce yield. Plan for a water source before you expand the grow room.
Pick it if: you like production chains and patient compounding. Avoid it if: you need cash immediately.
Gunsmith
The Gunsmith starts with a Class 1 permit, firearms, and ammunition. That is a strong opening because you can trade a high-value category legally. It also brings inspections, permit costs, and security scrutiny.
Guns pair well with the machinery and module systems: weapon mods and production can raise value, but the compliance cost is real. On Thin Margins, the permit alone costs 2,000 credits, so the margin has to carry it.
Pick it if: you want high-ticket sales and already understand the legal risk. Avoid it if: you want to avoid inspections entirely.
Chemist
The Chemist starts with lab equipment, which is expensive to buy later. Chemistry has the highest ceiling in the game: purity grades transform cheap reagents into high-value products. It also has the steepest learning curve and the most ways to waste inputs.
Start with one simple recipe, learn the temperature window, and add modules to reduce loss before scaling. The chemistry guide covers the machines; the recipes page lists the temperature and purity data.
Pick it if: you enjoy process optimisation and can tolerate failed batches. Avoid it if: you need a quick, low-risk return.
Rat Wrangler
The Rat Wrangler is the odd start. It leans on breeding and animal sales, with a lower initial ceiling than chemistry or guns but a distinctive supply chain. It is a good pick for a player who wants to learn the game's less obvious systems.
Treat it as a medium-difficulty run: you have a setup, but you still need a buyer and a way to scale. Do not ignore water and food quality; animals are affected by the same station systems as everything else.
Pick it if: you want a unusual run with a clear theme. Avoid it if: you want the most efficient path to the buyout.
Aquafarmer
The Aquafarmer starts with tilapia and a recirculating system. Fish production depends on water quality, food, and environment, which makes it a cross-system start: you learn water, biology, and sales at the same time.
A community buyout screenshot from an Aquafarmer run shows 154 days, 3,554 credits of estimated wealth, and a 14,600-credit buyout. That is one player's pace, not a benchmark, but it shows the start can finish the game.
Pick it if: you want a production start with a clear biological theme. Avoid it if: you want to ignore water quality.
Three announced but unavailable starts
The developers have mentioned Organ Trader, Junker, and Street Food Vendor as future scenarios. They are not selectable in the 1.0 build used for this page. Do not plan a run around them until they appear in the scenario menu.
Which start should you choose?
For a first run, pick Apprentice or Water Merchant. Both give you a usable income line and enough slack to learn the rent clock. For a second run, Chemist or Hydroponic Farmer shows off the production depth. For a challenge, Rock Bottom.
The starting scenario is not a permanent class. You can master water, chemistry, hydroponics, or organ trading later in the same run. The kit is a head start, not a cage.
FAQ
Can you change your starting scenario later? No. The scenario is chosen at the start of a run. You can still learn other trades during the run.
Which start is easiest? Apprentice and Water Merchant are the most forgiving. Rock Bottom is the hardest.
Are the three extra scenarios in the game yet? Organ Trader, Junker, and Street Food Vendor have been announced but are not selectable in the current 1.0 build.
Community source: Probably Stolen store page ↗, Steam Community guides ↗, and the in-game scenario descriptions. Workshop examples on the Steam Workshop ↗.
Related
More Probably Stolen Guides
A complete Probably Stolen chemistry guide: blender loss, heating plate temperatures, chem finisher contamination, purity tiers and machine module math.
Probably Stolen chemistry recipes with temperatures, yields, purity targets and machine notes for Dream Dust, Nightmare Dust, caffeine and Phanta.
How crime, suspicion, wanted bounties, security records, fixers, and raids work in Probably Stolen, plus how to keep contraband out of a search.
How Probably Stolen customers work: lower and upper level buyers, security, black market, haggling, special requests, and how to match stock to demand.
Probably Stolen difficulty explained: Price Gouge, Mark Up and Thin Margins modifiers, rent increases, permit costs, reputation multipliers and Endless Mode.
How to lay out a Probably Stolen shop: display cases, counter flow, attractiveness, theft risk, storage placement and the best use of limited floor space.
Probably Stolen endings explained: the shop buyout win, the end-of-run stats screen, failure states, Endless Mode and what carries into a new run.
Step-by-step Probably Stolen mod installation: subscribing on Steam Workshop, enabling mods, load order, manual installs, updates, backups and uninstall.